
Camera Calibration
The Camera Calibration Plugin for Final Cut Pro is a powerful tool to create looks and salvage problematic footage.
19,00 € plus VAT
Camera Calibration – Versatile, Powerful and often Misunderstood
Camera Calibration is a tool present in Lightoom and Camera Raw. It lets you redefine the primary colours, Red, Green and Blue. This means you don’t change the mix of the colours like you would do with any colour adjustment, you change the actual mixing ingredients.
You can use camera calibration to recover footage where strong light sources pollute the image, or you can use it as a powerful tool when creating a look.
Thanks to its smooth mathematics using the 3×3 Matrix, your footage will not break. I tested this plugin with 8-bit footage just to be extra sure. Take a look at it in the video.
Camera Calibration Tutorial
Main Features
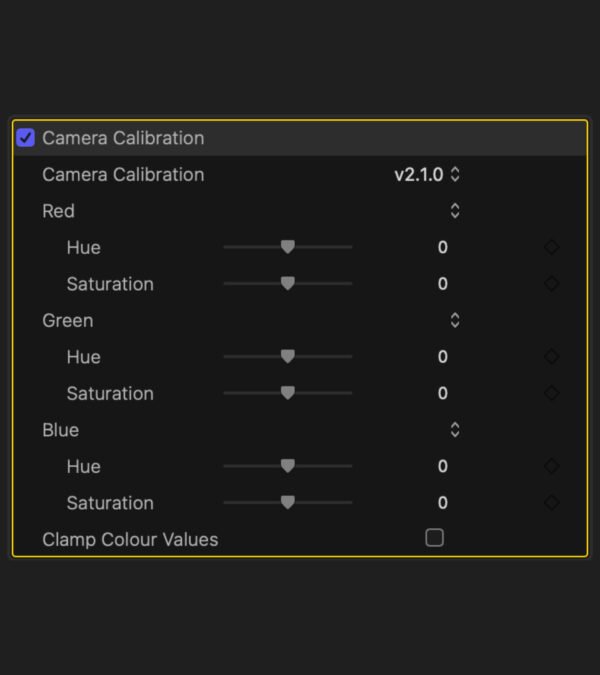
Remember, you’re not changing the mix of the colours, you’re changing the actual mixing ingredients.
Red Hue: Drag the slider to the right to make red more yellow, drag it to the left to make red more magenta.
Green Hue: Drag the slider to the right to make green more cyan, drag it to the left to make green more yellow.
Blue Hue: Drag the slider to the right to make green more magenta, drag it to the left to make it more cyan.
Saturation Sliders: The saturation sliders let you change the distribution of the primary colours. Increase saturation to add this colour, decrease saturation to remove this colour from the mix.
Clamp Colour Values: A side effect of using the 3×3 matrix is that you will push colours out of range. If you work under a good LUT, this shouldn’t be an issue. But if you don’t, you can clamp the colour values by ticking this box.
System Requirements
🎬 Final Cut Pro 11 or newer
🖥️ MacOs 15 or newer
Release Notes
2025-07-31 – Update v2.1.0
- simplified user interface
2025-07-23 – Update v2.0.0
- new internal process
- performance improvements
Even More Value
-
Final Cut Pro Plugin Bundle
Original price was: 342,00 €.197,00 €Current price is: 197,00 €. plus VAT
